
How to Install a Freestanding Tub Faucet (Complete Guide)

By Julian Gill Updated · 7 min read
Disclosure: Some of the links in this article may be affiliate links, which can provide compensation to me at no cost to you. You can read our affiliate disclosure in our privacy policy.
In this article
A freestanding tub faucet turns a bathtub into the centerpiece of the room. It also asks a bit more of the installer than a wall-mounted spout, because everything it needs comes up through the floor. Here is how I install one, step by step, and what to check before you close the floor.
Quick answer
To install a freestanding tub faucet, anchor its mounting bracket solidly to the floor structure, connect the hot and cold supply lines, fit the cover plate, then mount the riser and the faucet body on the bracket. Test the water flow and look for leaks below the floor before you finish.
Key takeaways
- The bracket is everything: a floor-mounted faucet is tall and gets bumped, so the bracket must not move at all.
- Plan the tub first: set the tub in place before you drill, so the spout lands over the water.
- Hot and cold on the right lines: mark the supply lines red and blue and check them twice.
- Test before you close: check every joint from below while the water runs.
What Is a Freestanding Tub Faucet?
A freestanding tub faucet, also called a floor-mounted tub filler, is a faucet that stands on its own riser next to the tub. It is not attached to a wall or to the tub. The water lines come up through the floor, inside the riser, to the valve and spout at the top.
It is the natural partner for a freestanding bathtub. These tubs usually have no deck and no wall behind them, so there is nowhere else to put the faucet. Many models also include a handheld shower on a holder, which is handy for rinsing hair and cleaning the tub.
It is most often installed in new construction or during a full remodel, when the floor is open and the old tub has been removed. Retrofitting one into a finished floor is possible, but you will have to open the floor to run the lines.
Before You Start: Plan the Position
In my experience as a plumber, most problems with tub fillers come from poor planning, not from the plumbing itself. Spend ten minutes on these points before you drill a single hole.
- Set the tub first: put the tub in its final spot and mark its outline on the floor.
- Check the spout reach: the spout must reach past the rim so water falls into the tub, not on the floor. Use the dimensions in the faucet instructions.
- Leave room for your hands: you need space to turn the handle and lift the handheld shower without hitting the tub.
- Look under the floor: find the joists and any pipes, ducts or wires below the spot you picked.
- Read the manual: each brand has its own bracket, rough-in and valve. Follow the manufacturer's instructions where they differ from this guide.
Tools and Materials You Need
- The faucet kit with its mounting bracket and cover plate
- Drill with a hole saw or spade bit
- 3/4 inch plywood or sheathing board for blocking
- Bolts or screws to fix the bracket
- Adjustable wrench
- Plumber's tape (PTFE)
- Hot and cold supply lines and fittings
- Red and blue tape or markers
- Level and tape measure
- Flashlight, bucket and rags
Safety first
Turn off the main water supply before you connect anything, and open a faucet to drain the lines. Check for electrical wires and pipes before you drill through the floor. If you are not sure how to tie into the hot and cold lines, call a licensed plumber.
How to Install a Freestanding Tub Faucet
These steps follow the most common design: a floor bracket with three legs, a cover plate and a riser pole that holds the faucet. Your kit may differ in the details, but the order stays the same.
- Prepare the bracket
Open the box and lay out the parts. You should find a mounting bracket, usually with three legs and three holes. The whole faucet will stand on this bracket, so it has to be anchored properly into the floor, not just set on the finished surface.
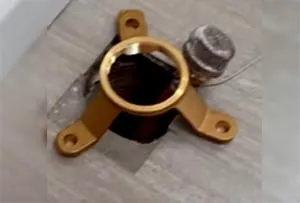
The mounting bracket in position on the floor. - Add blocking so the bracket cannot move
A bracket fixed only to the subfloor often moves around. Put a piece of 3/4 inch plywood or sheathing board under the bracket and bolt the two together. That gives the fasteners something solid to bite into.
- Install the cover plate
Fit the cover plate over the bracket. Make sure it is big enough to hide the bracket and the hole in the floor completely, and that it sits flat on the finished floor.
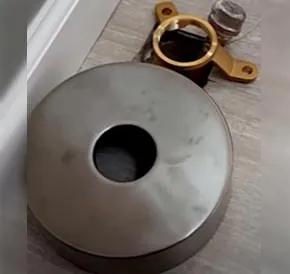
The cover plate hides the bracket and the floor opening. - Connect the supply lines
The supply lines run inside the bracket and the cover plate. Mark them red and blue: the red line goes to the hot water supply and the blue line to the cold. Wrap male threads with plumber's tape and tighten the fittings snugly with a wrench.
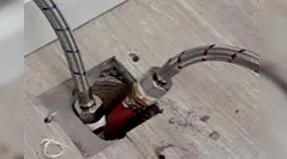
Red for hot, blue for cold. - Fit the riser to the bracket
Put the riser pole together with the bracket and the cover plate. Before you go further, turn the water back on and check from below that the supply connections are not leaking onto the ceiling downstairs.
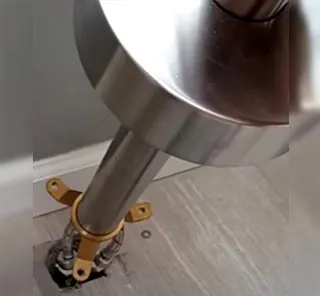
The riser, cover plate and bracket assembled. - Secure the pole and mount the faucet
Screw the pole firmly onto the bracket and check it with a level so it stands straight. Then install the faucet body on top of the pole, in the order given in the instructions.
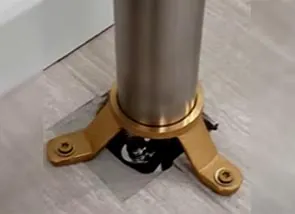
The pole screwed tight to the bracket. - Test the water flow
Turn the water on and run hot, then cold, then the handheld shower if you have one. Check that hot and cold are on the correct sides, that the flow is steady and that nothing drips at the base or below the floor.
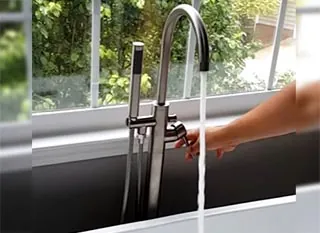
Check the flow and look for leaks after installation.
Common Mistakes to Avoid
- Anchoring to the finished floor only: tile or vinyl will not hold a tall faucet steady. Use solid blocking under the bracket.
- Drilling before the tub is placed: the spout ends up too far from the tub or too close to the rim.
- Swapping hot and cold: mark the lines and check them before you close the floor.
- Skipping the leak test: always check from below with the water running.
- Forgetting access: if you can, leave a way to reach the connections later, such as an access panel in the ceiling below.
Troubleshooting After Installation
| Problem | Likely cause | What to do |
|---|---|---|
| Faucet wobbles | Bracket not fixed to solid blocking, or a loose pole | Add blocking under the bracket and tighten the pole |
| Water stain on the ceiling below | Loose supply fitting under the floor | Shut off the water, retape and tighten the fitting |
| Hot and cold reversed | Supply lines connected to the wrong inlets | Swap the lines at the faucet inlets |
| Weak flow | Low supply pressure or debris in the lines | Check the pressure and flush the lines |
FAQs
Can I install a freestanding tub faucet myself?
Yes, if you are comfortable cutting into the floor and making water connections. If you need new supply lines run under the floor or a new valve, a plumber is the safer choice.
Do I need access from below to install a floor-mounted tub faucet?
It makes the job much easier. With access from a basement or the ceiling below, you can anchor the bracket and connect the supply lines from underneath.
Does a freestanding tub faucet need a shut-off valve?
Many models have a built-in valve body, but you should still be able to shut off the water to the faucet without closing the whole house supply. Check the manufacturer's instructions.
How far should a freestanding tub faucet be from the tub?
Close enough that the spout reaches over the rim and fills the tub without splashing outside it. Set the tub in place first and follow the reach given by the faucet maker.
Is a deck-mount faucet easier to install than a floor-mount one?
Usually, yes. A deck-mount faucet sits on the tub rim or a ledge, so there is no floor bracket to anchor and the supply lines are shorter.
Installing a freestanding tub faucet is not as hard as it looks. Plan the position with the tub in place, anchor the bracket to solid blocking, keep hot and cold on the right lines and test every joint from below. If you still need a faucet, start with our bathtub faucet reviews.